In this experiment, I use the public Mosquitto MQTT test server, but you can also follow my previous post to setup your own MQTT server.
Run node-red !
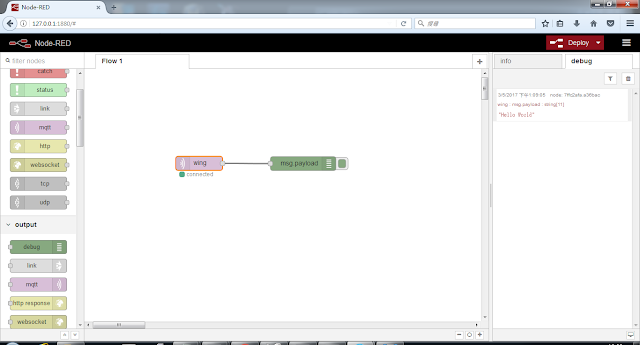
Run node-red , then you can see the following UI in your browserDrag "mqtt" node from the Left-Hand-Side (under input category) and drop to the Flow 1 area.
Similarly, drag and drop the "debug" node to the Flow 1 area.
While you moving your mouse inside the Flow 1 area, it is actually in the "wire mode", you can just move the "cross" (i.e. mouse cursor) to connect a wire from mqtt node to the debug node. (you click on the right square of the mqtt node and drag a line to the left square of the debug node.)
Then we have to configure the nodes, in this simple flow, only mqtt node is need to be configure. Just double click at mqtt node, and you will see
Then click the pencil at the end of "server", and you will see the sever input diaglog
You only need to need to enter the server name "test.mosquitto.org", then click Add on the top. It will then go back to the previous dialog. Now you can enter the topic "wing" (you can change to any other string). Finally press Done button on the top.
Now the Flow is finish creating, we can just press "Deploy" (on the top right) to start the flow.
You can see the mqtt node show status "connected"
You can also check the command prompt (where you run the node-red), it will show some debug information message, such as connected to test.mosquitto.org
To test the Flow, we can publish a message to the topic "wing" at the test.mosquitto.org server. You can open a command prompt at Windows, and run the following command
-h is the server name
-t is the topic
-m is the message you are going to publish
Then at the node-red UI, you should see a received message at the debug area (right hand side).


沒有留言:
張貼留言